01A Introduction and Navigation (2024)
Introduction
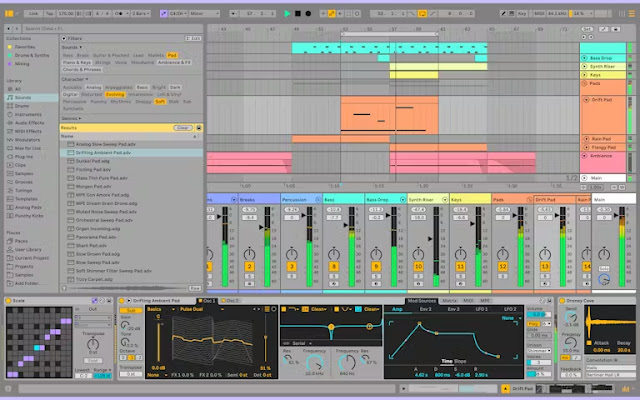
1. Info View

2. Preferences
Live’s Preferences window is where you can find various settings that determine how Live looks, behaves and interfaces with the outside world. This window is accessed from the Preferences command, which in Windows is available in the Options menu and in macOS is available in the Live menu. Preferences can also be accessed with the CTRL,(Win) / CMD,(Mac) shortcut.

3. Selector buttons (triangles)
Each one of the selector (triangle) buttons at the screen borders opens or closes up a specific view

You can re-size windows

4. The Browser
Live’s browser is the place where you find your library of musical assets:
- Sounds - library of sounds that are installed with the program, sorted by type of sound (bass, brass, effects, exotic, etc.) (for MIDI tracks)
- Drums - different drum kits (for MIDI tracks)
- Instruments - same as Sounds, but sorted by the Ableton Instrument that is creating it (Drift, Simpler, etc.) (for MIDI tracks)
- Audio effects - devices to change the sound e.g. Reverb, Delay, Overdrive etc. (for any tracks)
- MIDI effects - devices to change what you play e.g. Arpeggiator, Scale, etc. (for MIDI tracks)
- Max for Live - devices written in the Max for Live programming language that create new functions for Ableton Live
- Plug Ins - third-party devices, instruments, audio effects
- Samples - also known as Audio Clips, some are 'one-shots' (e.g. a single kick drum) and others are 'loops' (e.g. a full drum beat) (for Audio tracks)

5. Arrangement and Session View
Live has two ways to view projects:
- Arrangement shows the music along a musical timeline
- Session show the music in a “launching base” for clips
You move between views with these buttons

6. Audio tracks and MIDI tracks
Live can record two types of tracks
- MIDI tracks
- record the notes that you play in using a MIDI keyboard or controller
- or contain notes that click into a grid using your mouse.
- You need to drag a Sound or Instrument onto a MIDI track to hear the notes that are on that track.
- Audio tracks
- record the external sounds that you record e.g. guitar, vocals (you will need an audio interface to get the sound into your computer)
- or contain audio files / samples (WAV or MP3 or AIF format)
7. Tempo control
The tempo (speed of song) can be adjusted in the Control Bar’s Tempo field.
8. Mute and Solo and Volume
You can mute (silence) a Track by clicking on the Track Number
You can Solo a Track by clicking on the S button
The blue bar with numbers controls the Track volume

9. Places - Packs and finding your Folders
The Packs label in the browser shows you all Packs that come pre-installed with Live, as well as any that you’ve installed yourself. You can also see Packs that are available for your to download.

In order to work with your own folders in Live, you must first add them to the browser, either by dropping them directly into Live from the Explorer (Windows)/Finder (Mac) or by pressing the Add Folder button in the browser’s sidebar.
You should create a New Folder to save all your Ableton Live project files
10. Searching
Live’s browser has a search field that filters the contents of the selected sidebar label as you type. To search across all locations, press CTRLF(Win) / CMDF(Mac).

Navigating through your Ableton Live project
11. Start and Stop


Hands on
Try the following
- From the Menu: Help / Load Demo Set
- Solo tracks
- Mute tracks
- Change the volume level of tracks
- Change the Tempo of the song
- Change the Sound that is playing Track 1 or Track 2
- Change the Drum Kit that is playing
12. Zooming

1. To smoothly change the zoom level, click and drag vertically in the beat-time ruler at the top of the Arrangement View -
2 and 3. To zoom in and out of a selected Clip, use the computer keyboard’s + and - keys
4. To zoom into a selected Clip selection completely, press Z. You can revert back by pressing the X key.
5. To optimize the height of all tracks to fit the Arrangement View, click the H button or H key. To do the same for width click the W button or W key.
6. The Arrangement Overview is like a “bird’s-eye view“ of your music. To scroll the display, click within the outline and drag left or right; to zoom out and in, drag up and down.
7. To which part of the Arrangement you are seeing, drag the outline’s left and right edges.
8. To see a specific part of the Arrangement in more detail, click on it in the Overview and drag downwards to zoom in around that part.
9. To have the Arrangement display follow the song position and scroll automatically, turn on the Follow switch
13. Making Clips shorter
You can re-size Clips by clicking and dragging on the left or right edge of the Clip, once you see the cursor become a square bracket [ or ]

14. Splitting Clips (Control-E)
To split a clip in two halves, do the following:
- Unfold the track
- In the waveform or MIDI display, click at the position where you want the clip to be split;
- Execute the Split command.
To isolate a part of a clip, do the following:
- Unfold the track;
- In the waveform or MIDI display, drag a selection over the part of the clip you want to isolate;
- Execute the Split command to divide the original clip into three pieces.

15. Cut, Copy, Paste, and Duplicate
You can Cut and Paste clips by selecting them with mouse, then either right-click or use key commands
- CTRL-C for Copy
- CTRL-X for Cut
- CTRL-V for Paste
- CTRL-D for Duplicate
Hands On
Try the following with the Demo Song
- Moving Clips around by dragging
- Making copies and duplicates of Clips
- Splitting up Clips


Comments
Post a Comment